Friday, June 8, 2018

DIY Wedding Party Gifts the Groomsmen and Bridesmaids will Love - A How to Make Cufflinks, Earrings and Ring Dish Tutorial

blank earrings cufflinks with acrylic inserts blank ring dish tutorial
Hello, Alyssa Cardin here today for Craft Chameleon Blog! Today we are going to walk through making personalized pearl back earrings, cufflinks, and ring dishes. 


Best Blanks for vinyl for wedding groomsmen bridemaids gifts plus tutorials


I love making these because there are so many options, they are very easy to make, PLUS they look amazing when done. The hardest part is deciding on a design! My customers love them, most buy them for Bridesmaid/Groomsmen gifts. 

SuppliesItems listed with an * are clickable links to the products* Cuff Link Blanks with insert
* Bezel Earings Blanks wit insert
* Pearl Backs
* Ring dishes
* Vinyl
Transfer tape
E6000 or other similar glue
Optional Resin or Sealant
SVG or other digital design


Acrylic circles blanks offered by Craft Chameleon for vinyl and htv application

Once you have decided on a design, open the file that Craft Chameleon sent out with the template. The link to these files can be found in your shipping notification.

Copy the circle earring template and remove the numbers from the middle. We want to make sure the design will fit in the circle. Zoom the screen instead of changing the size of the circle if it is hard to see. 

Fit your vinyl or htv design in the correct circle size for your blank project.
Minimize your design so it fits in the circle, with a little room left around the design. Once it is verified the design will fit in the circle, cut and weed the design. 

Weeding vinyl is easier on the cutting mat - PRO Tip from Craft Chameleon

Once it is verified the design will fit in the circle, cut and weed the design. 

Craft Chameleon #1 in cutting small


Remove protective films prior to placing vinyl on the acrylic blanks.
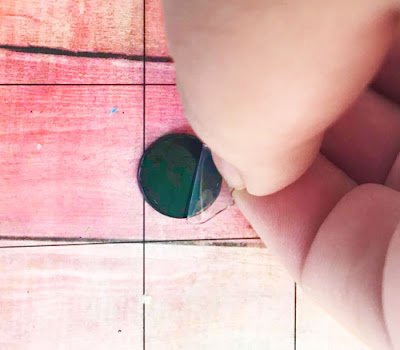
Use Transfer tape to pick up the design, but before applying the vinyl design to the blank acrylic insert, be sure to remove the plastic covering over the acrylic.

As shown, it helps to put the acrylic on the cutting mat to hold the acrylic in place when applying the vinyl design.


Press down on the transfer paper. Now the acrylic can be applied to the bezel earring back or the acrylic can be sealed. Sealing is optional.

The most popular methods of sealing the acrylic are Mod Podge Dimensional or 2 part Resin. The Mod Podge is more cost effective, easier to use and dries faster. However, The Mod Podge can be dented if someone tries hard enough. The resin can't.

Since earrings and cufflinks rub up against hair and clothing, I choose to seal the vinyl on the acrylics. Apply to sealant according to package instructions. If using Mod Podge, carefully squeeze the bottle and cover the acrylic, use a toothpick to ensure full coverage.


The acrylic will look cloudy at first but will clear up as it dries. If there are air bubbles, use a toothpick to remove from mod podge or breathe on the resin (you will look ridiculous but it works 😁). Let the sealant dry.


Once the Acrylic is dry, or if no sealant is used it is time to assemble the acrylic insert to the bezel backing. The method is the same for earrings and cufflinks, making matching sets a breeze!


Craft Chameleon recommends E6000 and it is my 'go to' adhesive, but there are other options out there just read the labels. Apply the glue to the inside of the earring or cufflink bezel and apply a little to the back of the acrylic insert. Wait about 30 seconds and then place the acrylic inside the bezel backing. 


Apply pressure for a minute and then let it cure for 24 hours or per the adhesive manufacturers instructions.  If you are making cufflinks, you are done.


The pearl earring backing is applied in the same manner as a regular earring back. Once the adhesive has set, push the backing on and your earring is complete. 


When my customers purchase the pearl backing I include the regular earring backs (Craft Chameleon includes them with the earrings) as well as the pearl backing. 

Now let's whip up the corrdinating ring dish!


To make the ring dish, select your design and fit it into about a 1.5 inch x 1.5 inch box in your design software.


Cut and weed the vinyl, and transfer to transfer tape. Cut the transfer tape down so it will fit in the middle of the ring dish.


Center the design and apply the vinyl by applying pressure and rubbing the transfer tape. Remove the transfer tape and you have completed the matching ring dish in no time at all.


Alyssa, thank you so very much for another fantastic blog post!
Please consider sharing this blog post on your favorite social media. Below is an image sized for Pinterest for safe keeping in your files there!

Best Blanks for vinyl for wedding groomsmen bridemaids gifts plus tutorials


Friday, May 25, 2018

How to Apply HTV to Burlap! PLUS Video


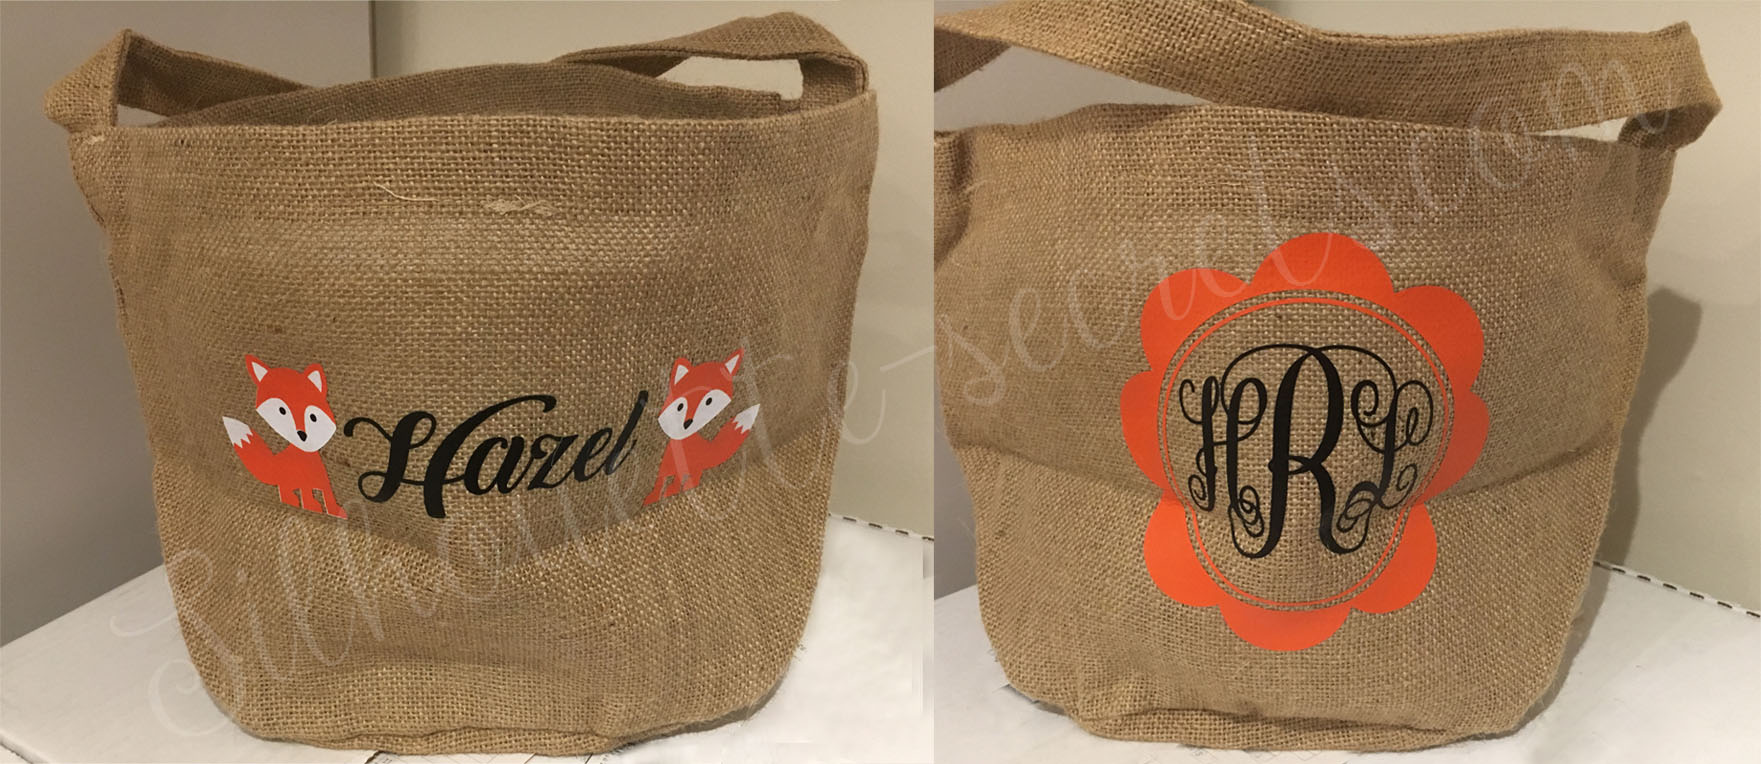
Did you see the video posted a few weeks back on creating a custom burlap bucket bag as a gift?
Burlap Bucket Bag - Craft Chameleon
This is EllyMae with SilhouetteSecrets+ and I'm here today to show you how I created it.
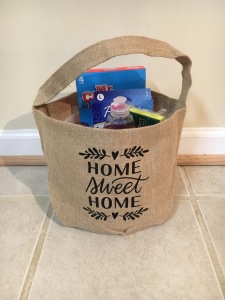
This was created with the Home Sweet Home by Kristen Magee from the Silhouette Design store and black Siser Easyweed vinyl.


IMG_2994
Measure the space you want to fill on the outside of your burlap bucket.


Home sweet home 1
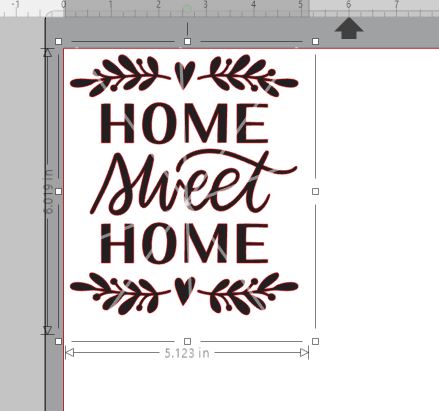
Open the design you have chosen and resize it to fit within the space you have measured. This design is 5.123" x 6.019".


Flip Horizontal copy.jpg
We are cutting the design from Heat Transfer Vinyl (HTV) so you want to mirror or flip your image before you cut. With the Silhouette software, right click on the design and choose Flip Horizontally.


Cut settings copy
Now to set the Cut settings. In Silhouette Studio, click on the Send tab in the top right corner. Change your Material to Heat Transfer, Smooth.

Adjust your blade depth if using a ratchet or premium blade. Then do a test cut if needed before clicking the 'Send' button at the bottom of the screen.

After it is cut, weed the heat transfer vinyl and apply to the burlap bucket bag. I used a heat press to apply mine as shown in the video.


IMG_2993
Fill your bucket with a variety of goodies and you have a New Home, Welcome to the neighborhood or First Time Home Buyer basket.

Burlapbucket_wm
And of course, after creating one, I just had to keep going. This one was for a baby shower gift for a friend and I filled it with all kinds of items for the new mom and baby.It was created using Fox by Lori Whitlock Design #160774, Monogram Script 2 Flower Circle by Rivka Wilkins Design #82245 and adding text for the name.

What ideas do you have?
Watch the video on YouTube here: https://youtu.be/5PKYUHokXVU


Please pin our image below. Sharing is caring!
Burlap Blank Bags Flags & More Craft Chameleon

Friday, May 18, 2018

How to Etch an Acrylic Bookmark with your SIlhouette Curio ~ Make a Quick Graduation Gift


Christi Hardin is today's Craft Chameleon guest blogger. She has put together a great blog post for you. ENJOY!

The month of May brings many things to celebrate.  High school and college graduations are in full bloom during this time.  Let’s make something for the graduate that will remind them of their accomplishment as they enter the next phase of their life.   Let’s etch a senior bookmark.

Supplies

Items listed with an * are clickable links to the products on the website.
Ribbon


Let's start by making a template using Craft Chameleon Tutorial video "Make Your Own Curio Template": https://www.youtube.com/watch?v=ETP92Wdok0k Be sure to save your cut file to use with your template.


Build your platen with your mats number 2, 2 and 1 (the sticky grid mat).
When completed, remove one side of the protective film on your acrylic. Then use double sided tape on the back of the bookmark and place it on your template on your Curio.  


Then create your design.  I used these two free (for personal use) variations from the DaFont Collegiate font, CollegiateFLF & CollegiateOutlineFLF to create the design. Center the design in the new template. 


Choose the Send Button. First be sure to turn off the cut lines on the outside of the bookmark from cutting the template.

Next, create a custom setting to etch Acrylic.
Action:  Etch
Tool:  Etching Tool
Etch
Speed: 5
Force:  17
Passes:  1
Mats: 5


You are ready to send your design to the Curio!


Add a ribbon and you are finished. What a wonderful and quick gift!


Thank you, Christi! I love this idea and great for those seniors heading off for continuing education! I can see it used as car charm too. 

Plus now that you have your template made the process will be so much faster next time! Easy to crank out teacher or classroom gifts.

Please Pin our image below on Pinterest we would appreciate this or any shares!

How to etch an acrylic bookmark using a Curio


Wednesday, May 16, 2018

Sunday, May 13, 2018

New & Free Tutorial for School Days DIY Re-Usable Photo Sign - Beginning or End of School Year


Reversible Last Day / First Day of School
Acrylic Chalkboard

By: Faye Mitchell – Blogger Extraordinaire

Faye is back with a great tutorial on making up our School Days Acrylic Photo Board. These boards are reusable at the beginning and end from year to year.


Supplies

Items listed with an * are clickable links to the products on the website.
* Acrylic Chalkboard with free cut file
Scissors
Vinyl Applicator / Squeegee
Transfer Tape
SVG Design Program

After gathering your supplies, open the Cut Design file provided by Craft Chameleon. The link is sent in your order confirmation email.

Make any necessary alterations you want to it.  I changed the name and added an additional design next to the name. I also changed the wording at the bottom of the board. The design file provided by Craft Chameleon is only for the first day of school I did a copy & paste of the design and then changed it to say the Last day of School. 


 Cut and weed your design.  Normally to save on vinyl I would combine the two designs to eliminate waste.


But in this case, I just left them separate and used separate pieces. 


It makes getting the design centered and layered onto the chalkboard easier I think.  If I wasn’t in a hurry and didn’t want to waste viny, I could have combined the designs before  cutting.


Ta-Da!!!! You’re done and have an amazing reusable, reversible chalkboard to use while taking your kiddo’s first and last day of school pictures.

Faye, you are amazing too! Thanks for another great tutorial. To add the date and other information you will need some coordinating paint pens. Then use some alcohol to remove for the next year.

Please consider pinning the image below. Sharing is Caring!

Acrylic Blank for DIY a reuseable photo board through all the school years


Acrylic blank chalk board tutorial for the end of the year photo board.


Friday, May 11, 2018

DIY Tutorial Curio Etching Metal Bottle Opener Father's Day Gift

Father's day is a month-ish away so this tutorial by Jennifer Childress is the perfect gift for Dad. Crack out your Silhouette Curio and personalize this credit card size stainless steel bottle opener. Read on and enjoy!

As a fairly new Curio user, I know the new terminology can be a bit overwhelming at first! Luckily this is a good beginner project to get you started (and you’ll also end up with a useful Father’s Day gift to pop open those glass bottles)!

Supplies
*Items listed with an * are clickable links to the products on the website.
* Etching blade - used in the tutorial the Chomas etching tip, Craft Chameleon CB09 with etching tip also works, Chomas Precision Etching tip will also work.
* Stainless Steel Bottle Opener
Transfer Tape
Design of your choice - Font used in this one, SportsWorld link here.


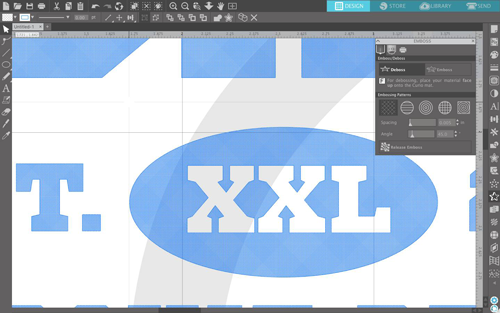
We’ll start by creating a design or using a pre-made one. For this tutorial, I created one using the Sportsworld font and subtracting the “XXL” from an oval shape.


Once your design is created or pulled into Silhouette Studio, make the design a little bigger so you can see what is going on and to get a closer etch pattern fill. When we shrink it back down, we’ll have a really tight etch fill. Select the Emboss/Deboss panel. Make sure your design is selected then select your etch pattern under the Deboss header. I like to use the crosshatch pattern because it works nicely when etching. Once the pattern is selected, you’ll see some lines going through your design, but they’re spaced pretty far apart for etching. 


Change the spacing to 0.005 inches. You should see some really tight lines display on the screen. Once you see this, click Release Emboss. NOW… we’re not done yet. Select your design again, select the crosshatch pattern again, change spacing to 0.005 inches, THEN change your angle to 45 degrees.


You’ll see even more lines in your pattern going in a different direction (this will make the etch more solid). Click Release Emboss, and size your image as needed for your bottle opener. 


When I measured, my etching area was approximately 2.25 tall by 2.125 wide. I added the red square around it so I could see my work area and size my design appropriately. Now we’re ready to change our “Send” settings! Easy peasy, right?


For the Craft Chameleon bottle opener, the following settings worked great:
Material: Metal sheets- Etching
Action: Etch
Tool: Etching Tool
Speed: 3 (if you’re in a hurry, this can be upped a little)
Force: 33
Passes: 2
Platforms: 4 (I’ll explain more about this below)

NOTE: Make sure you delete or mark your square box as “No cut” since this only used for reference.


Now let’s get our machine ready!
How many platforms do we need? Well, let’s measure the thickness of our bottle opener. It is approximately 2 mm. We want the total height to be 6 mm, so we’ll use 4 platforms for this. 


To hold the bottle opener on the sticky mat and to protect the mat from the etching dust, I put a layer of transfer tape on my mat (sticky side up)!


Place your bottle opener on the mat so that it matches the location on your screen. Since these are a pretty basic shape, I didn’t use a plastic template to hold it in place. Make sure you press down pretty hard so it’ll stick good. 


Put your Amy Chomas etching tip in the machine.


Load the mat.
Press SEND in Silhouette Studio and watch the etching begin.


When your etch is complete, there will be some dust on the bottle opener and mat. Run it under some water and gently wipe away the dust. When you’re done, you’ll have a nice Father’s Day gift completely customized for the dad in your life!


Great tutorial Jennifer, thank you for sharing your expertise!

Please consider sharing this image on Pinterest. Sharing is caring!                          curio etched stainless steel bottle opener craft chameleon blog