

Hello, Alyssa Cardin here today for Craft Chameleon Blog! Today we are going to walk through making personalized pearl back earrings, cufflinks, and ring dishes.

SuppliesItems listed with an * are clickable links to the products* Cuff Link Blanks with insert
* Bezel Earings Blanks wit insert
* Pearl Backs
* Ring dishes
* Vinyl
Transfer tape
* Bezel Earings Blanks wit insert
* Pearl Backs
* Ring dishes
* Vinyl
Transfer tape
E6000 or other similar glue
Optional Resin or Sealant
SVG or other digital design
Optional Resin or Sealant
SVG or other digital design

Once you have decided on a design, open the file that Craft Chameleon sent out with the template. The link to these files can be found in your shipping notification.
Copy the circle earring template and remove the numbers from the middle. We want to make sure the design will fit in the circle. Zoom the screen instead of changing the size of the circle if it is hard to see.

Minimize your design so it fits in the circle, with a little room left around the design. Once it is verified the design will fit in the circle, cut and weed the design.

Once it is verified the design will fit in the circle, cut and weed the design.

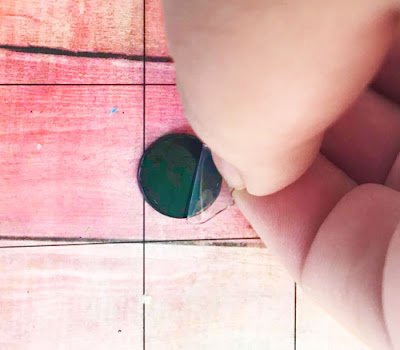 Use Transfer tape to pick up the design, but before applying the vinyl design to the blank acrylic insert, be sure to remove the plastic covering over the acrylic.
As shown, it helps to put the acrylic on the cutting mat to hold the acrylic in place when applying the vinyl design.


As shown, it helps to put the acrylic on the cutting mat to hold the acrylic in place when applying the vinyl design.

Press down on the transfer paper. Now the acrylic can be applied to the bezel earring back or the acrylic can be sealed. Sealing is optional.
The most popular methods of sealing the acrylic are Mod Podge Dimensional or 2 part Resin. The Mod Podge is more cost effective, easier to use and dries faster. However, The Mod Podge can be dented if someone tries hard enough. The resin can't.
Since earrings and cufflinks rub up against hair and clothing, I choose to seal the vinyl on the acrylics. Apply to sealant according to package instructions. If using Mod Podge, carefully squeeze the bottle and cover the acrylic, use a toothpick to ensure full coverage.

Since earrings and cufflinks rub up against hair and clothing, I choose to seal the vinyl on the acrylics. Apply to sealant according to package instructions. If using Mod Podge, carefully squeeze the bottle and cover the acrylic, use a toothpick to ensure full coverage.

The acrylic will look cloudy at first but will clear up as it dries. If there are air bubbles, use a toothpick to remove from mod podge or breathe on the resin (you will look ridiculous but it works 😁). Let the sealant dry.

Once the Acrylic is dry, or if no sealant is used it is time to assemble the acrylic insert to the bezel backing. The method is the same for earrings and cufflinks, making matching sets a breeze!

Craft Chameleon recommends E6000 and it is my 'go to' adhesive, but there are other options out there just read the labels. Apply the glue to the inside of the earring or cufflink bezel and apply a little to the back of the acrylic insert. Wait about 30 seconds and then place the acrylic inside the bezel backing.

Apply pressure for a minute and then let it cure for 24 hours or per the adhesive manufacturers instructions. If you are making cufflinks, you are done.


The pearl earring backing is applied in the same manner as a regular earring back. Once the adhesive has set, push the backing on and your earring is complete.

When my customers purchase the pearl backing I include the regular earring backs (Craft Chameleon includes them with the earrings) as well as the pearl backing.
Now let's whip up the corrdinating ring dish!

To make the ring dish, select your design and fit it into about a 1.5 inch x 1.5 inch box in your design software.


Cut and weed the vinyl, and transfer to transfer tape. Cut the transfer tape down so it will fit in the middle of the ring dish.


Center the design and apply the vinyl by applying pressure and rubbing the transfer tape. Remove the transfer tape and you have completed the matching ring dish in no time at all.
Please consider sharing this blog post on your favorite social media. Below is an image sized for Pinterest for safe keeping in your files there!


