 |
| Applying Vinyl to Color Changing Cups |
Watch this video to learn how to apply adhesive vinyl to our color-changing cups! |

Showing posts with label vinyl. Show all posts
Showing posts with label vinyl. Show all posts
Sunday, July 12, 2020

Saturday, May 16, 2020

Friday, August 17, 2018
We Can't Get Enough Unicorns! More Unicorn Party Favors both Vinyl and Etched Tutorials!

Welcome today's guest blogger back, Alyssa Cardin!

Supplies:
Items listed with an * are clickable links to the products
* Black hairbrush
* Metal Compact Mirrors
* Oilslick Adhesive Vinyl
Electronic Cutting & Etching Equipment
Transfer tape
Cutting Mat and weeding tools
SVG or other digital design
SVG or other digital design

Let's make the hairbrush first!
First open the image you plan on using. Next let's work on the name in the middle of the image. The name Abby is written in the font: Too Freakin Cute Demo.

Type this out, resize if necessary, then place the name on the image.

Once the name is properly placed, You will need to subtract the word from the image. In the Silhouette Studio software, open the modify panel. Making sure both the image and the name are selected then click subtract all.

Then you can move the name away from the image and delete the name.
Place the oilslick vinyl on the cutting mat and load in the machine. Select vinyl as the material, set the cut settings and click send. Do a test cut, this material feels a bit thicker, so I used the following settings: blade 2, speed 3, and force 10. however I am also using an older blade, so these settings may be too much for users with a newer blade.

Now the design is cut and weeded

Time to apply transfer tape to the front of the design and rub the back.


Peel the backing off from the vinyl and apply the vinyl to the brush.


Follow the same steps if you want to place a vinyl image on your compact mirrors.


Want to etch your compact on a Curio? Follow the steps below.

To etch the mirror, open the mirror and put it face down on the embossing mat. I found this to fit in the curio best this way. Have the front cover toward the bottom of the mat. My mat is still pretty sticky, so my mirror didn't move while etching. But I have also used painters tape around the edges of irregularly shaped items to keep them in place on the mat.

Click on the emboss menu.
Select your design and size it to the appropriate size. Make you leave enough room around the edges. My designs were about 1.5 by 1.5.
Select Deboss and then use these settings:
Cross Hatch
Spacing - .004
Angle - .5
 |
| Close up of etch lines |

Set material to metal etching sheets and make sure you select the etching tool. I do speed 3, Force 26, and pass 1 with Platform 3 (2 plus embossing mat). Again, these settings work for me but other settings might work best for others. Check that the mats slide smoothly and freely under the etching tip on your Curio. Then take a deep depth and click send.
I usually put the mirror through 2 or 3 times before taking it out. As long as you don't move the mirror between passes, you can send it back through and it will etch in the same spot.
I usually put the mirror through 2 or 3 times before taking it out. As long as you don't move the mirror between passes, you can send it back through and it will etch in the same spot.

When satisfied with the quality of your etch, remove the mirror from the mat. I find it helpful to peel the mat away from the mirror. There will be extra dust on the mirror from etching, but brush that off away from the mat. You want to be careful to not to get dust on the mat, the dust makes your less sticky which leads to you mat replacement sooner.
Thank you Alyssa! I know there were quite a few excited girls at that birthday sleepover!
If you would please share this article on your favorite social media we would certainly appreciate!
For Facebook, Instagram, Twitter and others

For Pinterest

Friday, June 8, 2018
DIY Wedding Party Gifts the Groomsmen and Bridesmaids will Love - A How to Make Cufflinks, Earrings and Ring Dish Tutorial

Hello, Alyssa Cardin here today for Craft Chameleon Blog! Today we are going to walk through making personalized pearl back earrings, cufflinks, and ring dishes.

SuppliesItems listed with an * are clickable links to the products* Cuff Link Blanks with insert
* Bezel Earings Blanks wit insert
* Pearl Backs
* Ring dishes
* Vinyl
Transfer tape
* Bezel Earings Blanks wit insert
* Pearl Backs
* Ring dishes
* Vinyl
Transfer tape
E6000 or other similar glue
Optional Resin or Sealant
SVG or other digital design
Optional Resin or Sealant
SVG or other digital design

Once you have decided on a design, open the file that Craft Chameleon sent out with the template. The link to these files can be found in your shipping notification.
Copy the circle earring template and remove the numbers from the middle. We want to make sure the design will fit in the circle. Zoom the screen instead of changing the size of the circle if it is hard to see.

Minimize your design so it fits in the circle, with a little room left around the design. Once it is verified the design will fit in the circle, cut and weed the design.

Once it is verified the design will fit in the circle, cut and weed the design.

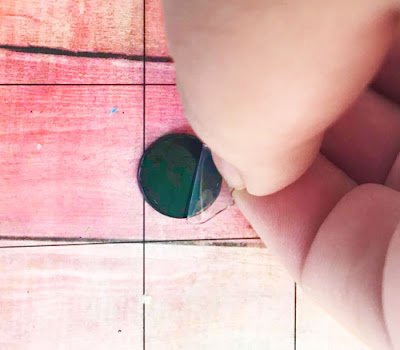 Use Transfer tape to pick up the design, but before applying the vinyl design to the blank acrylic insert, be sure to remove the plastic covering over the acrylic.
As shown, it helps to put the acrylic on the cutting mat to hold the acrylic in place when applying the vinyl design.


As shown, it helps to put the acrylic on the cutting mat to hold the acrylic in place when applying the vinyl design.

Press down on the transfer paper. Now the acrylic can be applied to the bezel earring back or the acrylic can be sealed. Sealing is optional.
The most popular methods of sealing the acrylic are Mod Podge Dimensional or 2 part Resin. The Mod Podge is more cost effective, easier to use and dries faster. However, The Mod Podge can be dented if someone tries hard enough. The resin can't.
Since earrings and cufflinks rub up against hair and clothing, I choose to seal the vinyl on the acrylics. Apply to sealant according to package instructions. If using Mod Podge, carefully squeeze the bottle and cover the acrylic, use a toothpick to ensure full coverage.

Since earrings and cufflinks rub up against hair and clothing, I choose to seal the vinyl on the acrylics. Apply to sealant according to package instructions. If using Mod Podge, carefully squeeze the bottle and cover the acrylic, use a toothpick to ensure full coverage.

The acrylic will look cloudy at first but will clear up as it dries. If there are air bubbles, use a toothpick to remove from mod podge or breathe on the resin (you will look ridiculous but it works 😁). Let the sealant dry.

Once the Acrylic is dry, or if no sealant is used it is time to assemble the acrylic insert to the bezel backing. The method is the same for earrings and cufflinks, making matching sets a breeze!

Craft Chameleon recommends E6000 and it is my 'go to' adhesive, but there are other options out there just read the labels. Apply the glue to the inside of the earring or cufflink bezel and apply a little to the back of the acrylic insert. Wait about 30 seconds and then place the acrylic inside the bezel backing.

Apply pressure for a minute and then let it cure for 24 hours or per the adhesive manufacturers instructions. If you are making cufflinks, you are done.


The pearl earring backing is applied in the same manner as a regular earring back. Once the adhesive has set, push the backing on and your earring is complete.

When my customers purchase the pearl backing I include the regular earring backs (Craft Chameleon includes them with the earrings) as well as the pearl backing.
Now let's whip up the corrdinating ring dish!

To make the ring dish, select your design and fit it into about a 1.5 inch x 1.5 inch box in your design software.


Cut and weed the vinyl, and transfer to transfer tape. Cut the transfer tape down so it will fit in the middle of the ring dish.


Center the design and apply the vinyl by applying pressure and rubbing the transfer tape. Remove the transfer tape and you have completed the matching ring dish in no time at all.
Please consider sharing this blog post on your favorite social media. Below is an image sized for Pinterest for safe keeping in your files there!

Friday, March 16, 2018
3 Fast Fun Easy Useful & Unique DIY Baby Gifts + Tutorials 3 of 3

Three Fast, Fun, Easy, Useful and Unique DIY Baby Gift Tutorials
Part 3 - This is the final day of the Best Baby Gift Set Tutorials.

Our intrepid guest blogger Faye Mitchell finishes out this week with the final tutorial for making the coordinating acrylic sign "shhhh...Baby is sleeping". So it's time to gather the supplies needed.
Supplies:
Items with * have a link to the Craft Chameleon products
SVG Design Program ( Studio, Design Space, SCAL, etc)
* Vinyl
Vinyl Application Tool
* Weeding Tool
The first step is to decide on the design. I knew I wanted my design to coordinate with my wipes container, so I used the same cute little tiger and added some jungle leaves plus a zebra-striped type heart along with the wording.
Serendipitously, I found some ribbon, in my craft stash, that matched the green of the leaves and it was seriously too cute! Perfect for sign hanging.
To design, I used a general measurement of the board, 11x9” and drew a rectangle in my design space. I knew my board had the corners missing so I stayed away from them when I created the design.
Serendipitously, I found some ribbon, in my craft stash, that matched the green of the leaves and it was seriously too cute! Perfect for sign hanging.
To design, I used a general measurement of the board, 11x9” and drew a rectangle in my design space. I knew my board had the corners missing so I stayed away from them when I created the design.

To make the leaves I took one jungle leaf design from the Silhouette store flipped it horizontally. and rotated it. Next, I duplicated it to create a total of 3 leaves. Each leaf I adjusted either with size and/or rotation. After lining them up by the stems, I welded them so they were one clump of leaves instead of 3 separate pieces. I just thought it looked better this way but it could have been left separated as well.

Next, I cut my designs up. While the vinyl was cutting I added the ribbon to the board. Note: I ordered the acrylic photo board with the 2 hole version so it came with the two holes pre-drilled in the top.


Once you get the vinyl all cut and weeded it’s time to apply it to the board. I cut the piece with the tigers and heart separate from the words so that I could layer the tan layer underneath the orange layer of the tigers. I started off putting the wording onto the board and then the leaves.


Now the board is completed!

It also brings us to the end of this tutorial trilogy. We can't thank Faye enough for sharing her creativity! I know we will be seeing more of her in future posts.

Thursday, March 15, 2018
3 Fast Fun Easy Useful & Unique DIY Baby Gifts + Tutorials 2 of 3

Three Fast, Fun, Easy, Useful and Unique DIY Baby Gift Tutorials
Part 2 - One tutorial is the day before and the last will be the day following this.
Part 2 - One tutorial is the day before and the last will be the day following this.

Guest blogger Faye Mitchell back with the next tutorial. This post we will make these darling wipe cases. So gather up your supplies....

Supplies:
Items with * have a link to the Craft Chameleon products
SVG Design Program ( Studio, Design Space, SCAL, etc)
* Vinyl
Vinyl Application Tool
* Weeding Tool ....and open up your files.

I chose to use the zebra stripe template that is provided by Craft Chameleon when I purchased the baby wipes container from them.


I then picked out a cute little tiger svg cut file from the silhouette store and added the wording “wild child” in the ZP Three Bears Cut Bonus font obtained from the Silhouette store as well.
Once my design was completed, it was time to cut and apply the vinyl to the baby wipe container.
I did the first layer of black zebra stripes first.


Be sure to use a clear transfer tape so you can see to add the vinyl. Because the wipe container isn’t entirely flat or smooth like an acrylic, you will need to burnish the vinyl a lot with your applicator tool to get it to stick. Be very careful and remove your transfer tape slowly.

After the zebra stripes, I cut the wording “wild child” white background layer and put the orange layer on top of that and then onto the wipe container.

The last step was to add the cute little tiger which finished it off!

Subscribe to:
Posts (Atom)