Showing posts with label Brother Scan n Cut. Show all posts

Monday, March 9, 2020

BIMONTHLY FREEBIES!

PART 2

Grab our kikuyugrass font available for free for the next two weeks after that it will be available in the Designers Marketplace.

Kikuyugrass Font Free


My Very Crafty Life has created this fantastic freebie for you!  Available for free for the next two weeks in the Designers Marketplace.

Plus check out MVCL's FB group by the same name! 

Get it NOW!

Friday, March 16, 2018

3 Fast Fun Easy Useful & Unique DIY Baby Gifts + Tutorials 3 of 3

Three Fast, Fun, Easy, Useful and Unique DIY Baby Gift Tutorials 
Part 3 - This is the final day of the Best Baby Gift Set Tutorials.

Our intrepid guest blogger Faye Mitchell finishes out this week with the final tutorial for making the coordinating acrylic sign "shhhh...Baby is sleeping". So it's time to gather the supplies needed.
Supplies:
Items with * have a link to the Craft Chameleon products
  SVG Design Program ( Studio, Design Space, SCAL, etc)
* Vinyl
  Vinyl Application Tool
* Weeding Tool 
* Diamond Reamer


The first step is to decide on the design.  I knew I wanted my design to coordinate with my wipes container, so I used the same cute little tiger and added some jungle leaves plus a zebra-striped type heart along with the wording.

Serendipitously,  I found some ribbon, in my craft stash, that matched the green of the leaves and it was seriously too cute! Perfect for sign hanging.

To design, I used a general measurement of the board, 11x9” and drew a rectangle in my design space.  I knew my board had the corners missing so I stayed away from them when I created the design. 


To make the leaves I took one jungle leaf design from the Silhouette store flipped it horizontally. and rotated it. Next, I duplicated it to create a total of 3 leaves. Each leaf I adjusted either with size and/or rotation.  After lining them up by the stems, I welded them so they were one clump of leaves instead of 3 separate pieces.  I just thought it looked better this way but it could have been left separated as well.


Next, I cut my designs up.  While the vinyl was cutting I added the ribbon to the board.  Note: I ordered the acrylic photo board with the 2 hole version so it came with the two holes pre-drilled in the top.


Once you get the vinyl all cut and weeded it’s time to apply it to the board.  I cut the piece with the tigers and heart separate from the words so that I could layer the tan layer underneath the orange layer of the tigers.  I started off putting the wording onto the board and then the leaves.


Now the board is completed!
It also brings us to the end of this tutorial trilogy. We can't thank Faye enough for sharing her creativity! I know we will be seeing more of her in future posts.


Thursday, March 15, 2018

3 Fast Fun Easy Useful & Unique DIY Baby Gifts + Tutorials 2 of 3

Three Fast, Fun, Easy, Useful and Unique DIY Baby Gift Tutorials 
Part 2 - One tutorial is the day before and the last will be the day following this.

Guest blogger Faye Mitchell back with the next tutorial. This post we will make these darling wipe cases. So gather up your supplies....


Supplies:
Items with * have a link to the Craft Chameleon products
  SVG Design Program ( Studio, Design Space, SCAL, etc)
* Vinyl
  Vinyl Application Tool
* Weeding Tool 
* Diamond Reamer


....and open up your files.


I chose to use the zebra stripe template that is provided by Craft Chameleon when I purchased the baby wipes container from them.  


I then picked out a cute little tiger svg cut file from the silhouette store and added the wording “wild child” in the ZP Three Bears Cut Bonus font obtained from the Silhouette store as well.

Once my design was completed, it was time to cut and apply the vinyl to the baby wipe container.
I did the first layer of black zebra stripes first.


Be sure to use a clear transfer tape so you can see to add the vinyl. Because the wipe container isn’t entirely flat or smooth like an acrylic, you will need to burnish the vinyl a lot with your applicator tool to get it to stick. Be very careful and remove your transfer tape slowly.


After the zebra stripes, I cut the wording “wild child” white background layer and put the orange layer on top of that and then onto the wipe container.  


The last step was to add the cute little tiger which finished it off!


Two gifts down and one to go! See you tomorrow and to work on the last gift item, " shhhh baby is sleeping" acrylic sign. 


Wednesday, March 14, 2018

3 Fast Fun Easy Useful & Unique DIY Baby Gifts + Tutorials 1 of 3

Three Fast, Fun, Easy, Useful and Unique DIY Baby Gift Tutorials 
Part 1 - Stay tuned for the following 2 posts to make all 3 gifts.

Hi everyone, Faye Mitchell back with another guest blog post or two or three!  This time I’m making a baby gift set using the amazing products you can purchase from the Craft Chameleon. Today's tutorial shows you how to create the "Stop" "Wash your hands before touching mine" stroller or pumpkin seat tag.


Supplies:
Items with * have a link to the Craft Chameleon products
  SVG Design Program ( Studio, Design Space, SCAL, etc)
  Vinyl Application Tool
* Weeding Tool 


I first assembled my supplies to make the “Stop” "Wash Your Hands before touching mine" tag.  Then I opened the design template for the 3” octagon that Craft Chameleon sent to me when I purchased the octagon shaped acrylic.

If you are using Silhouette Studio software, the Studio design you open is the correct size so you just have to send it to your machine to cut.  If you open the SVG design in Cricut Design Space, be sure to size it using the dimensions shown in the attached png file. Other design software may or may not need to size the SVG files. If you use another software let us know if you have to resize the SVG files.


Cut your vinyl and weed. Apply the vinyl to the octagon acrylic making sure the hole is at the top. If you need more detailed instructions on vinyl cutting and placement see my other blog post HERE, where it goes into more detail.


The final step to complete the tag by adding the ball chains. Using two ball chains, so it will be sure to reach around the handle of the baby carrier or stroller, attach them to each other before putting it through the hole of the acrylic.

Now the baby's friendly reminder is ready. Stay tuned for tomorrow and we will work on the next gift set item, the baby wipes container!

Saturday, January 20, 2018

Super Simple, Super Cute, Super Bowl Tic Tac Toe Part 2

Faye Mitchell, who brought us Part One of this blog post is 
back with Part 2. Take it away Faye!

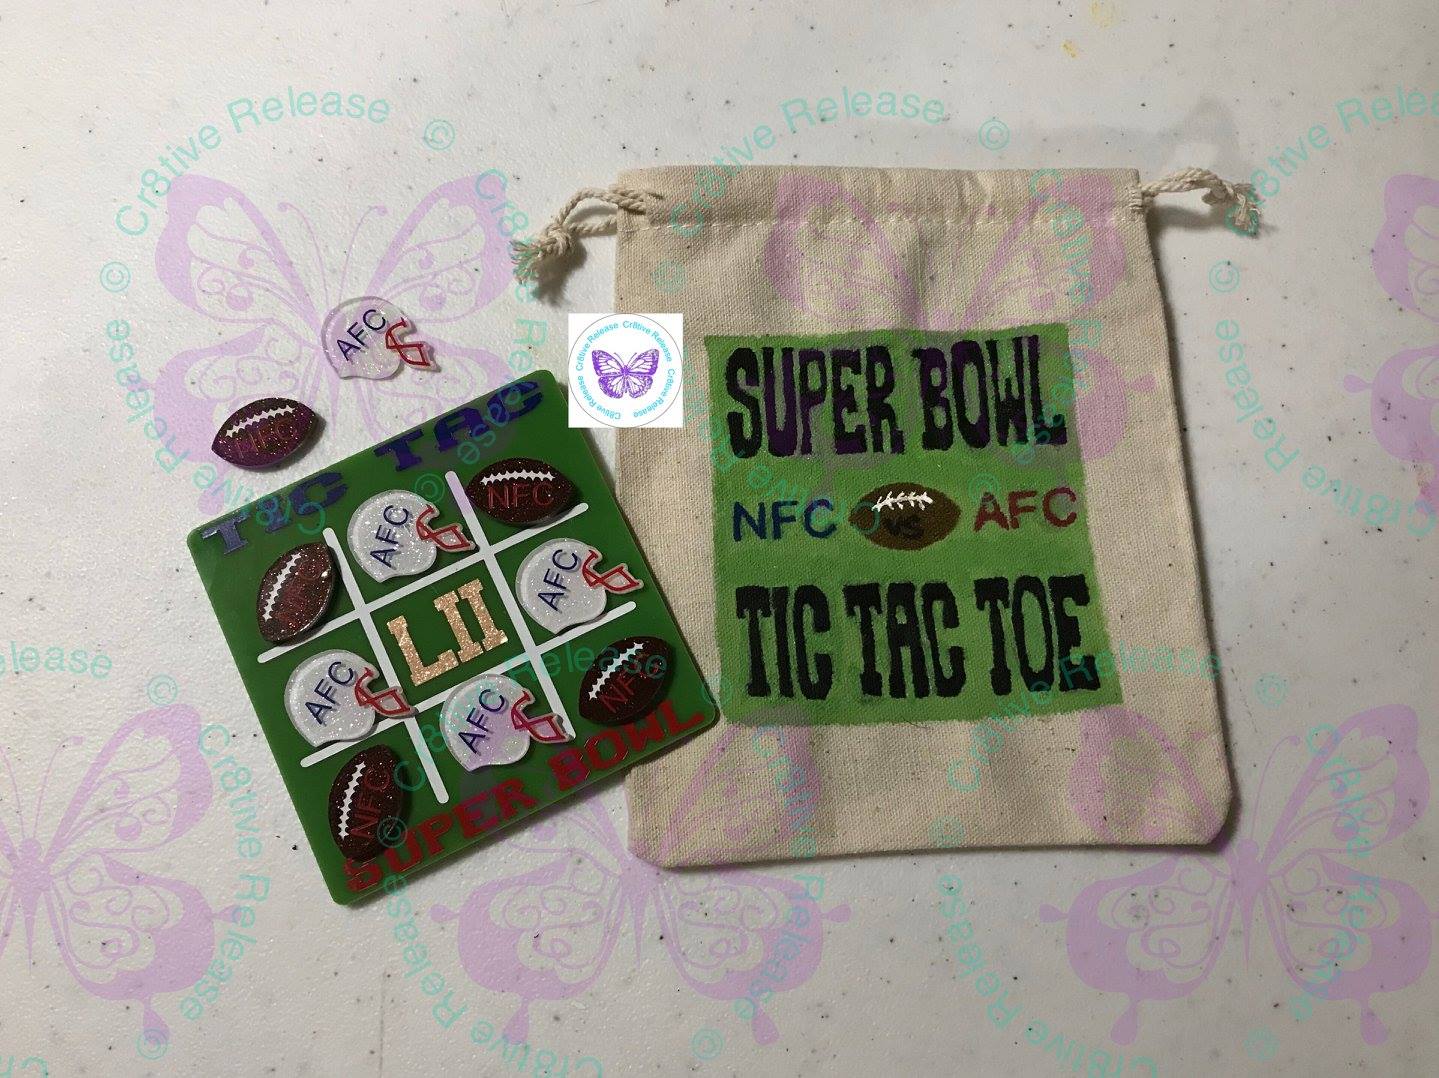
Even though I’ve finished my Tic Tac Toe Game board and am able to play, I’m not completely done. I want to keep my board and pieces together, so here is my storage solution. Craft Chameleon sells these cute little natural canvas bags that fit the game boards with pieces perfectly.

If you’re like me you want your little storage bag to be just as cute as the game board you’re putting inside of it.  In order to do this you will need a few things along with the natural canvas bag.

You can always use HTV, but not everyone has access to a heat press. So here is an alternative method using fabric paint.

Initially I was going to use fabric markers to label the bag and add another tic tac toe cross hatch game space on the front of the natural canvas bag.  I quickly changed my mind after I saw how badly the “non-bleeding” fabric markers were actually bleeding. Plus a second game board seemed redundant since I had a super cute game board stored inside.


After making this decision I went with a new design plan and painted a green square on the front of the natural canvas bag.  Thankfully the fabric paint did not bleed like the markers did.  You could use a stencil to create this square but I just freehanded it. It was a rare moment in my life where I wasn’t focused on making sure it was an absolute perfect square.  

While that was drying I went back to design studio and created a stencil of what I wanted my title to be.  Using some scrap vinyl and reverse weeding I created my stencil which I laid on top of the green square and carefully dabbed my chosen colors in the various spots.  


Once it dried some I removed my stencil and did some touch ups. Then I freehanded both the football stitching and 'VS' onto the football. After that I was done! 


Now I have a Super Cute, Super Bowl Tic Tac Toe Game board with coordinating pieces and storage bag.