Showing posts with label burlap blanks. Show all posts

Friday, May 25, 2018

How to Apply HTV to Burlap! PLUS Video


Did you see the video posted a few weeks back on creating a custom burlap bucket bag as a gift?
Burlap Bucket Bag - Craft Chameleon
This is EllyMae with SilhouetteSecrets+ and I'm here today to show you how I created it.
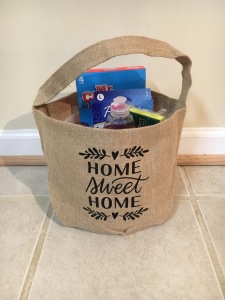
This was created with the Home Sweet Home by Kristen Magee from the Silhouette Design store and black Siser Easyweed vinyl.


IMG_2994
Measure the space you want to fill on the outside of your burlap bucket.


Home sweet home 1
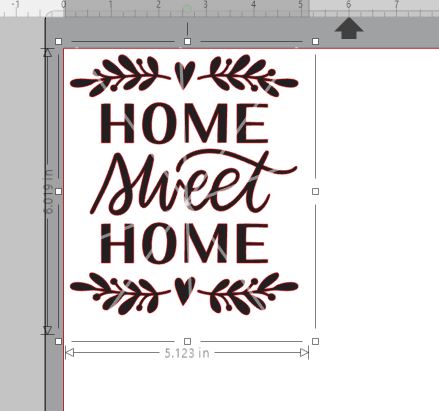
Open the design you have chosen and resize it to fit within the space you have measured. This design is 5.123" x 6.019".


Flip Horizontal copy.jpg
We are cutting the design from Heat Transfer Vinyl (HTV) so you want to mirror or flip your image before you cut. With the Silhouette software, right click on the design and choose Flip Horizontally.


Cut settings copy
Now to set the Cut settings. In Silhouette Studio, click on the Send tab in the top right corner. Change your Material to Heat Transfer, Smooth.

Adjust your blade depth if using a ratchet or premium blade. Then do a test cut if needed before clicking the 'Send' button at the bottom of the screen.

After it is cut, weed the heat transfer vinyl and apply to the burlap bucket bag. I used a heat press to apply mine as shown in the video.


IMG_2993
Fill your bucket with a variety of goodies and you have a New Home, Welcome to the neighborhood or First Time Home Buyer basket.

Burlapbucket_wm
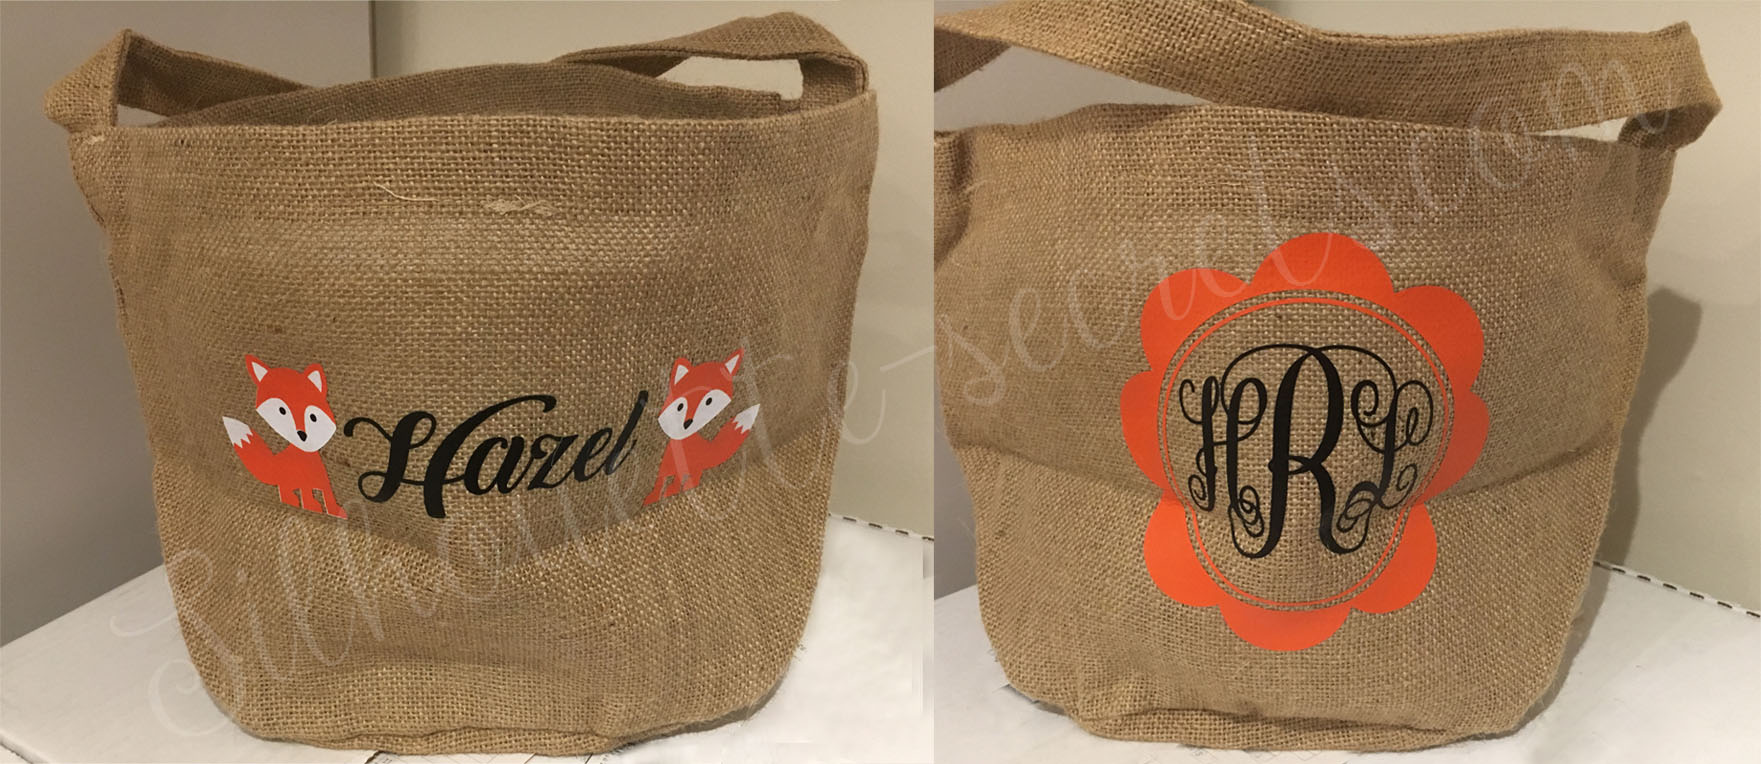
And of course, after creating one, I just had to keep going. This one was for a baby shower gift for a friend and I filled it with all kinds of items for the new mom and baby.It was created using Fox by Lori Whitlock Design #160774, Monogram Script 2 Flower Circle by Rivka Wilkins Design #82245 and adding text for the name.

What ideas do you have?
Watch the video on YouTube here: https://youtu.be/5PKYUHokXVU


Please pin our image below. Sharing is caring!
Burlap Blank Bags Flags & More Craft Chameleon

Tuesday, March 6, 2018

Burlap Bunny Bags - Heat Press & Iron Tutorial using Heat Transfer Vinyl

Photographs CG Swafford

Hi everyone!  I’m CG, a crafter/hobbyist/home business owner in southwest Ohio.  I have been married to my wonderful husband for 10 years and I am a stay at home mother of 2 great children, an 8 year old daughter, and a 4 year old son.  I find time to craft and create between school-time and daily life and I enjoy every second.   I received both of my Silhouette Cameo original and a Silhouette Cameo 3 as gifts.  I currently use Silhouette Design Software for Business. 

I have been using my Silhouette Cameo for home crafts, birthday décor and gifts since 2012.  I am honored to be apart of the Craft Chameleon Blog and I am so excited to share these super cute burlap bunny bags with you today.  I will be demonstrating 2 ways to apply heat transfer vinyl to the burlap bags, with a heat press, and with a home iron.

Supplies:
Items with * have a link to the Craft Chameleon products

* Bunny Face File  - these are free with your purchase. 
      The file links are found in your shipping confirmation.
  Siser Easyweed Heat Transfer Vinyl in Black & Royal Blue
  Vinyl Cutting Machine
  Silhouette Designer Software
  Teflon Cover Sheet
  Heat Press or Home Iron
Step 1
Download files from Craft Chameleon for this project.  We will be using a modified version of CC Bunny Face.  Open the downloaded file in your design software.  


Step 2
Select the image, right click and then select Ungroup.  We will be removing the ears from the image and using the face portion only.   Now select the ears and delete.  This will leave the face on your screen.

Step 3
Select all the parts of the face & Group.  Resize the image to approximately 6” wide x 4” tall.


Step 4
Using the text tool add a name to your bunny face using your favorite font.  I have chosen to use Smoothie Shoppe for Olivia & Whackadoo for Owen.  These are both free fonts found at Dafont.com.  Size the name and center to your liking.  Be sure to weld the font if the letters overlap.


Step 5
I added a bow as an embellishment to the top of my design.  I sized it to about 2x2.5.  I have had this image for so long I can’t remember where I got it.  However, Craft Chameleon has this bow design for $.90 and you get an acrylic bow to use later!


Step 6
Mirror your image and text.  


Step 7
Cut your pieces from heat transfer vinyl in your desired colors.  Use the recommended cut settings for your machine and vinyl type. I cut the Siser Glitter first and Siser Easyweed next.  Since these cut with different cut settings, I had to send them thru the Silhouette at separate times.
Step 8 Heat Press
{If you are using a home iron, skip this these steps and refer to the Step 8 Home section below.}
Weed the vinyl & prepare your heat press to the correct temperatures for your brand of vinyl


Step 9
Press the Bunny Bag for a few seconds using a Teflon or cover sheet to get out some of the moisture. Tip: Some crafters use a folded towel inside to keep the lining straight and unbonded. Plus it can aid in getting an even press.

Step 10
Align black vinyl in the appropriate location on the bag being sure things are level and even.  Press for the recommended time.  


Step 11
Remove carrier sheet and press again for a few more seconds.  If the vinyl lifts with the carrier sheet, lay the carrier sheet back down and press again with the heat press.  Be sure to apply with lots of pressure. 


Step 12
Repeat with pink vinyl pieces.  Once the vinyl has all been applied and carrier sheet removed, cover one last time with Teflon cover sheet and press again for a few more seconds.  This process will set the design. 


Step 8 Home Iron
Adjust the heat dial on your Home Iron to Wool or slightly below.  I have found that this temperature setting works best with the burlap material. 


Step 9 Home IronOn a firm work surface, place a Teflon cover sheet over your bunny bag.  Press the design area for a few seconds to remove excess moisture. Tip: Some crafters use a folded towel inside to keep the lining straight and unbonded. Plus it can aid in getting an even press.


Step 10 Home Iron
Next, align the black bunny eyes & whisker piece to the desired location.  Be sure it is level and centered where you want.  Cover with Teflon sheet and press down firmly for 10 to 15 seconds with your home iron.  Do not move it back and forth. If your iron does not cover the entire design press in segments until the entire piece has been pressed.


Step 11 Home Iron 
Remove the Teflon cover sheet and lift carrier sheet from the vinyl.  If the vinyl lifts with the carrier sheet, place the carrier sheet back down and recover with Teflon sheet and press again with the home iron.  Pressure is key!


Home Iron TIP: If the vinyl is having trouble adhering to the burlap, I have found that burnishing it a bit really helps.  I do this with my iron or my vinyl squeegee after the vinyl is heated a bit through the Teflon cover sheet.  I have found that this helps to get the vinyl down in the grooves of the burlap and create a secure bond.


Step 12 Home Iron
Once the vinyl is applied and carrier sheet has been removed, cover the design area with the Teflon sheet again and press a few more seconds with the home iron.  This will set the design. 


To Complete
Repeat steps 10 -12 with the nose, bow, and name.


Voila! Your Burlap Bunny is in/on the Bag!


Thank you CG Swafford!


Friday, January 26, 2018

Burlap Pillow Cover Tutorial for Valentine's Day

Burlap Pillow Blank using htv for decorating your home on Valentines Day
Photo Credits to Renee Crowe


Today I would like to introduce Renee Crowe as our guest blogger!  We are so pleased to have her show you how to use one of our burlap pillow covers and htv to fashion some seasonal Valentine's Day decor!

Supplies Needed:
*Burlap Pillow Cover from Craft Chameleon
*Glitter Heat Transfer Vinyl from Craft Chameleon
Pillow or pillow insert
Heat PressSilhouette Cameo and Studio Software or Electronic Cutting Machine (Cricut, Scan n Cut) with coordinating software
Items  with * are links to Craft Chameleon products


Ready to design my pillow cover, I went to the Silhouette Store. I selected the Tree Trunk with the heart for my Valentine's theme.

I wanted a font that had hearts in it, so I headed over to dafont.com. They have thousands of freeware/shareware fonts. So I searched and after choosing the Heartland font, I downloaded it to my computer.

Now to start my design. I decided to do my tree trunk in brown htv and my words in glitter htv. I kept it simple using only two colors.

My husband always tells me that he loves me forever and a day so I used that saying. I turned my heat press to 300 degrees and so it would be heating up.
I cut my design from my vinyl (remember to always reverse the design when you are using HTV).
After cutting my vinyl I arrange it on my pillow cover. When using both glitter HTV and regular HTV remember they have different temperature setting so make sure you remember that when cutting.
 Personally I like to do my colors one at a time, so first I do my brown and then heat press my pink. I use a Teflon sheet to cover my vinyl and heat press for fifteen seconds. To place the vinyl. Repeat for the glitter words. Then follow the manufacturers' instructions to complete the press.

Craft Chameleon has a facebook group were all the members share tips and tricks for heat pressing on burlap. Join the group here and be sure to answer the questions to get in!

I use a pillow form for the inside of the pillow and now it is ready to use. 

Easy and cute décor for Valentine’s Day!


Thursday, August 18, 2016

Free Gift with Order through 2016!

Flat Leon is having so much fun selecting and giving gifts, it was decided - free gift with purchase for the rest of 2016!

Monday, November 9, 2015

It's a Party with PPP!

Happy Monday! I hope you're ready because today it's a party with PPP! (Now I have that song stuck in my head;)

IF you're new here, let me explain a little about Punch Place Plus.
They're a small, family owned business (Michael and Jamie), have two part-time employees and specialize in unique, inexpensive wholesale items for us crafters. They not only have a great selection of items but are one of the best businesses with the most amazing customer service!

Here are a few items that Punch Place Plus offers:
Doll Making/Decorating Items
Jewelry Blanks/Jewelry Making
Blank Acrylics
Keychains & Hardware
Headbands
Headband Blanks
Bling Buttons/Flatbacks
Artist Trading Cards
Burlap Blanks
Punches & Dies
Suede Fabric
Veiling
Blank (empty) Wipe Cases
Tassels
Ribbons
Items to showcase what you've made (headband stands etc.)
And MUCH MUCH MORE!!!

Double Sided Permanent Adhesive Sheets


 Doll Sole Dies

 Jewelry Tools

1.) Glass Wine Bottle Stopper 2.) Turquoise Glitter Disc
3.) Acrylic Pony Hair Cuff 4.) Pattern Cheetah Rectangle

Hardware

Bling Buttons

Artist Trading Cards

Burlap Blanks

Headband Display


A No Hassle Wholesale Craft Products for Professional Crafters!

What is a party without a "goodie"?!
Punch Place Plus is offering a $20 Voucher to PPP to one winner!

How to Enter:
Visit Punch Place Plus and tell us your favorite item
Follow Punch Place Plus via Google Friend Connect (right hand side of blog)

Good Luck!

This giveaway will close at midnight, November 16, 2015. Winner will be drawn via random.org and have 24 hours to claim their prize.