Thursday, October 4, 2018

Multiple layers of HTV colors isn't scary! Just take one step at a time.


Oh my goodness, Faye is back guest posting for us and per usual it is another great tutorial! So let's get started.


Supplies Needed:
·        Black tote bag from Craft Chameleon
·        Siser glitter HTV From Craft Chameleon
·        Silhouette cameo
·        Cutting mat
·        Silhouette design studio
·        Weeding tool
·        Scissors
·        Fancierstudio 15” x 15” Heat press
·        Teflon sheet


Decide on a project and design. I’ve decided to make a Black Canvas Tote Bag from Craft Chameleon with a Halloween design on it.  Gather all the needed supplies and tools to make your project.

You may want to turn on your heat press prior to cutting your vinyl so that it has time to heat up and is ready to go as soon as you’re ready to press.  I usually turn my press on as soon as I know I’m going to do a HTV project so that it has plenty of time to heat up.


Open your design program and select the design you want to put on your tote from your design library. 


I choose a design by Miss Kate’s Cuttables … “I’m done Adulting, Let’s Go Trick or Treating” for this project.

Adjust the design’s size to be as large or as small as you would like.  I usually place a rectangle shape onto my workspace in the size I need to help visualize the spacing more accurate.  


Since this design uses black for several of the words and my tote bag is black I know it won’t show up very well if at all.  So, I ungroup the design and use my color palette to choose other colors that will work better.  I changed all the black words to green and some of the orange words to purple.  I didn’t have to change the orange words since they would have shown just fine but I did so for my own personal taste.  I also made my rectangle black to help visualize the black tote behind my design.


Now that your design is ready you’re going to want to mirror it.  You can do this several ways, but I find the easiest way to do it is by just doing a horizontal flip of the design.  Sometimes Silhouette Studio will prompt you when you go to cut and ask if you want to mirror the design but sometimes it doesn’t.  Because of this I always try to remember to mirror the design myself.  Once mirrored, you click send and head onto the next step.


I chose to do my design all in Siser Glitter HTV, so I selected “Heat Transfer, Glitter” from the material list and adjust my blade accordingly.  I have found the default settings provided by Silhouette work well for me, though, this might not be the case for everyone else.  With this being said, I adjust my blade to a 3, and leave the cut settings at Speed 5, Force 33, and Pass 1.


Put your HTV down on the cutting mat the shiny side down.  The shiny side is the transfer sheet and you don’t want to cut this when cutting your design.


Since your design has multiple colors you’re going to want to click on the “FILL” settings so you can cut each color out separately.  Once on this screen, you’ll select which color you want to cut first and then you hit “SEND” and your vinyl cut.

Now repeat the last 2 steps for all the colors of the design.


If you’re comfortable enough with your multi-color layering skills, you can adjust and move the design around so that you’re not wasting a bunch of vinyl. If you’re new to cutting HTV and multi-color layering, then I recommend leaving the design as you have it and just weeding the excess HTV away. As you can see in my sample photos I am fairly comfortable with layering multi-color designs, so I moved them around to save on HTV usage


Another handy trick is to use magnets that I got from Craft Chameleon to hold my Teflon sheet onto my heat press.  I do this because I’m always laying it down between presses and I forget where I lay it at.  I also found that sometimes when I would lay it on top of my design it would cause my HTV to shift and I didn’t like this.  Now that it is attached to the top of my heat press I don’t lose the sheet anymore and my design doesn’t shift as I go to press.

Now onto the fun part… pressing your cut pieces onto your tote bag.  First, you’re going to want to make sure your heat press is turned on and your settings are appropriate for the type of HTV you are using.  I have my heat press set at 305° and 15 seconds of medium pressure.   This might not be the correct settings depending on your press and HTV. 

Lay down your tote bag nice and flat on the bottom surface of your heat press and do a quick 10-15 second press to help release all the wrinkles your tote has from shipping.


Once you’ve pressed most of the wrinkles from your tote bag you’ll put down the first colored HTV where you would like it to go.  I tend to go with the largest piece so I can see that I’ve placed it in the correct spot easier.  This doesn’t always work though if you have a design that has colors layering over top of other colors.  In this case, there is no overlap, so I choose my largest piece and placed it onto the tote bag with the shiny transfer sheet side up.    

Now it’s time to press.  You close the lid of your heat press and wait for it to beep after the 15 seconds is up.  Then you open the heat press and remove the transfer sheet from over the top of your HTV.  Not all types of HTV has transfer sheets and not all of them can be removed while still hot, so you’re going to want to check to make sure to remove that transfer sheet according to what kind of release it has.   

Siser glitter HTV comes with a transfer sheet and is hot/cool release so you can remove the transfer sheet as soon as you finish pressing it.  If the HTV starts to pull up when you’re removing the transfer sheet, then put the transfer sheet back down and do another quick press with a tiny bit more pressure. 


Repeat process for all the remaining colors. 


Once all the colors have been pressed onto your tote bag do one final press.  

Pay close attention to the types of vinyl you are using as some require more or less heat and pressing time as well as not being able to have other Vinyl layered over top of them. Multiple layers on top of each other will be taught in a future tutorial. 


Once all the colors have been pressed onto your tote bag do one final press.   Remember, doing layers of multiple colors in HTV doesn’t have to be scary especially if you just take it one step at a time. 


Sharing is caring and we would love it if you could share our blog post.
Horizontal image for social media:
www.craftchameleon.com

Verticle Image is sized for Pinterest:
www.craftchameleon.com


Wednesday, September 19, 2018

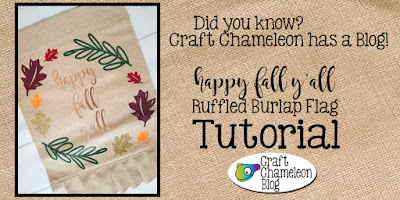
Fall Ruffled Burlap Garden Flag Tutorial - from blank to beautiful - step by step tutorial - heat transfer vinyl and MORE!


While the temperatures may not indicate it, fall is just around the corner. We are very lucky to have as our guest blogger today, Liz DeLise. She has written a great post on creating a fall themed ruffled garden flag. Let's get to it!

With Labor Day behind us Fall has [un] officially begun!  Time to switch over the décor to all things leaves and pumpkins.  This post will guide you through how to make a burlap garden flag.  I am partial to the ruffle bottom garden flag but the same can be done on any of the garden flags sold at Craft Chameleon.  

Materials Needed:
* items have links to the Craft Chameleon items
12” x 16” [Ruffle Bottom] Garden Flag 
Siser glitter heat transfer vinyl
* Foil and Siser Heat Transfer Adhesive


You can find a variety of digital designs for your Garden Flag HERE or you can use one you already have.  I have a design that I put together using a laurel wreath, some fall leaves and adding in southern style text “happy fall y’all”.  [I use Silhouette Studio].


As you can see, the Garden Flag design is going to be larger than a standard size 12” x 12” cut mat.  That’s ok though since I am going to be using multiple colors to cut the design.  
Since you’re using heat transfer vinyl you will need to flip your design horizontally.  


When using multiple colors, ungroup your design and then regroup by color.


You will cut each color individually and then puzzle piece the design back together when adding it onto the garden flag.


Note: I used foil and glitter heat transfer vinyl for this project because I love all things that glitter.  You can use regular heat transfer vinyl and do as many colors as you want.  I chose glitter because I already had scraps of all the colors I needed in order to complete the project.  That is the great thing about garden flags, the designs you add to them can be made from scraps.

Editors input: Hot off the presses Craft Chameleon has foil and Siser adhesive!


Once all of your pieces are cut it is time to puzzle piece the design back together onto the garden flag.   
Start with the center and work your way out.  I used rose gold foil for my center but again, you can use whatever color you want.  Place and press down your center, following whatever method you use for heat transfer materials.  I personally use a heat press.  
Now add your wreath or laurel and leaves.  The key to applying multiple colors in one press is to make sure that the transfer layer on top of the vinyl is not under any other pieces of heat transfer vinyl.  I trim my pieces really close to help with this.  If that’s not doable for you then lay out how you want the design to be on the flag and press so that you don’t have any issues.

Looking at my picture above you may see some overlap but trust me none of it is under any other pieces of heat transfer.  They can overlap on top but never have that top layer under. 


  Here’s what the final product looks like once everything is pressed on.  

Now that your design is pressed onto your flag, it’s time to add it to your garden.  Happy Fall Y’all!
  
Thank you, Liz and your cute little helpers!

For our readers, remember sharing is caring so we have 2 images we would really appreciate you sharing on your social media and on Pinterest.

Tutorial on htv on burlap garden flag

blank burlap garden flag with ruffle htv blank


Wednesday, September 12, 2018

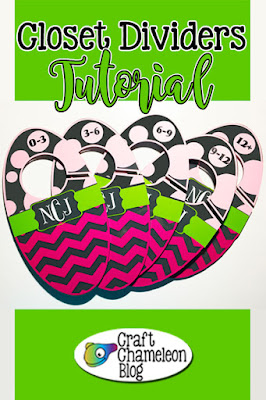
Baby It's Organized In Here! - Gorgeous Blank Acrylic Closet Dividers Tutorial - Personalize with Vinyl - Use Our Free File or Create Your Own

Hey guys Jennifer here as this weeks guest blogger!  I'm excited to share this project because it's something I found very useful and also fun to make! My baby girl will be here any day now, and these closet dividers are perfect for organizing all the clothes from baby showers and thing I have picked up throughout my pregnancy. So let's get started!

Materials Needed:
* items have links to the Craft Chameleon items
*Oracal Vinyl
Transfer Tape
*Acrylic Closet Dividers with free designs
Alcohol Wipes (optional)


This is a fairly easy project and is perfect for someone wanting to learn how to use several colors of vinyl at a time. When you purchase the product, Craft Chameleon sends a few different digital files for boy themes and girl themes, but you can create your own using their files for sizing help.

Since I am having a girl (and I am from south Alabama), I decided on the girl themed chevron and polka dots with space for a monogram. I removed the designs I didn't want to use and was left with pieces I needed.

REMEMBER- the files are perfectly sized for the acrylics so do not resize them if you are using the Silhouette Studio software. For those of you using Cricut Design Space a png is included in the files for sizing. Video here.


The only extra things I added to the design were a monogram and the numbers for the clothing sizes. Make sure you remember to size the monogram and clothing sizes for your design! 


Once this is done, make 5 copies of each shape for your acrylic closet dividers. I wanted to cut all the colors at the same time, so I arranged them on the screen in a way that I could run the mat through as few times as possible. I did have to run the mat through a second time for the last polka dot pieces and the numbers for the clothing sizes. 


Cut vinyl to size using a paper cutter (good old fashioned rules and scissors work too), then place the vinyl on the mat to match the screen. REMEMBER- don't mirror your sticky vinyl and the color goes on top. 


Once all the pieces are cut out, weed each one and cut them out so they can individually be applied to the acrylic.


I forgot to snap a photo, but the acrylics have a clear protective film on each side that needs to be removed before you start. I also like to clean the acrylic with an alcohol wipe to take off any grime that may have gotten on there and to ensure my vinyl sticks as well as possible.


Using the transfer tape, take one piece at a time and layer it on the acrylic. This can be a bit tricky, but take your time. It is worth so worth it!


Once you have applied all your pieces to the acrylics, you're left with 5 precious closet hangers that are personalized! 


Since these were made for personal use and babies grow up fast, I plan to remove the numbers as she gets older and replace them with new sizes. They would also be great to use in children & tween's closets separating trousers and jeans and blouses, tees and dresses. 

A big thanks to Jennifer for this weeks tutorial! Remember sharing is caring, so we have provided 2 images to share on social media or Pinterest.

Craft Chameleon Blog tutorial
Share on your favorite social media.


Craft Chameleon Blog
Pinterest sized image.


Wednesday, September 5, 2018

* New Website * Grand Opening of Store * Drawing for Cameo 3 *

GRAND OPENING

The Craft Chameleon brick and mortar store is finally having it's Grand Opening while it's website is brand spanking new! We are celebrating online and in-store!

 grand opening schedule
Click here for a printable copy.


Don't miss the Camero Drawing! Starts 9/6/2018 Ends 9/18/2018
 Enter to win Cameo
Link is on the slideshow on the home page of the NEW website!


Good Luck!


Wednesday, August 29, 2018

White Glitter Acrylic Family Birthday Board Tutorial - No painting, glitter or epoxy needed! 2018


Welcome back Rhonda Fox as our guest blogger today! This is such a detailed tutorial you are going to want bookmark or print it out!

Let's dig in!

  Transfer tape
  Cutting machine
  Cutting Matt
  Weeding Tool
  Parchment Paper
  Work Gloves (no bumps)- optional

  Heat Press - set to 320


 First you will need to get your template attachment, sent in your shipping confirmation email from Craft Chameleon. Open your email attachment following the instructions given and save the file where you can find it again.


This is what the template looks like when you open it. 


Here, using the Silhouette Studio software, I have added an oval shape to fit the shape of the actual celebration board using the ellipse tool. Center the oval on the top line of the rectangle as shown above. Highlight both oval and rectangle and go to the Transform Panel and choose HORIZONTAL and the middle alignment. This will center the oval across the top of the rectangle.


Go to the MODIFY Panel and with the oval and rectangle highlighted, choose WELD.


Your design should now look like this. 


Draw another oval and place within the shape you just completed. Edit until you find the shape and line thickness you like.


Now you can design with your own fonts, words and flourishes.


Cut your flourishes, heading, months and special dates from the black glitter HTV using the appropriate settings for your machine. In addition to those, I use the over cut (triangle in the lower right-hand corner) option. If you are using Siser glitter HTV remember to mirror your graphics.


Make sure to remove the protective plastic coating prior first so you don't forget later. It will be messy if you forget and ruin your acrylic. 


Cut a sheet of parchment paper large enough that when you lay the acrylic on the paper you will have enough to fold over on top also. DO NOT use a Teflon sheet, the striations will show in the plastic.


Using the htv carrier sheet, place your htv design on the acrylic celebration board and then fold the parchment paper over to cover the htv and board. The yellow in the photo is heat transfer tape.


Cover the base plate of your heat press with parchment, place your acrylic with the design side down on the parchment paper.  If you place the design side up, your acrylic will have a matte finish, not the current gloss finish. Cover with parchment.

Press with firm pressure for 15 seconds or until you can remove the carrier sheet without pulling off your design. After carrier sheet is removed, replace the board face down on the parchment paper and cover.  Press again for another 15 seconds.

Carefully remove the HOT* acrylic by lifting it with the parchment paper and placing it on a flat smooth surface. Place something heavy on top to help keep the acrylic celebration board flat until cool. *This is when you may want to use some work gloves without gripping bumps as the bumps leaves marks.


Add the months above each hole on the board with Oracle 651 black vinyl. It's really easy using the file with the months that came free with the Celebration Board. They are spaced and ready to cut! Cut and apply.


Again make sure to remove the protective plastic from all the acrylics.


Cut names and dates, then apply. I placed the names on the glitter side and birth date on back (not glitter) side of each the disc.


Add 2 of the oval jump rings in the holes under each month. I found by doing this the discs hang more evenly. However earwires can also be used.


Slip the discs on the Double J earwires. If you would like to "lock" them into place try silicone earring backs. Using earwires also makes it easier to add a new birthday, wedding or anniversary dates later.

As I assembled the discs, I added an Angel Wings Charm for family members who had passed. I added the DOD on back of the disc underneath the DOB. You might like to also add charms for anniversaries or other special dates.


Attach a chain, ribbon, or jute string for your hanger and you are done.

This is a great project that brings a lot of satisfaction. What's more important than family? Be sure to post your take on the Celebration Board!

Thank you so much Rhonda Fox. This is inspirational!

Please inspire other crafters by sharing the images below on your favorite social media and Pinterest accounts.

Imaged Optimized for Pinterest

Image Optimized for FB, IG, Twitter, ect