 |
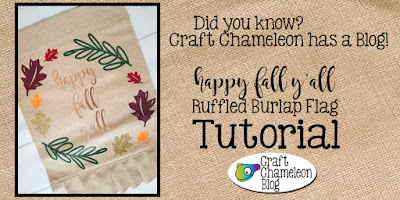
With Labor Day behind us Fall has [un] officially begun! Time to switch over the décor to all things leaves and pumpkins. This post will guide you through how to make a burlap garden flag. I am partial to the ruffle bottom garden flag but the same can be done on any of the garden flags sold at Craft Chameleon.
Materials Needed:
* items have links to the Craft Chameleon items
* 12” x 16” [Ruffle Bottom] Garden Flag
* Siser glitter heat transfer vinyl
* Foil and Siser Heat Transfer Adhesive
* items have links to the Craft Chameleon items
* 12” x 16” [Ruffle Bottom] Garden Flag
* Siser glitter heat transfer vinyl
* Foil and Siser Heat Transfer Adhesive
You can find a variety of digital designs for your Garden Flag HERE or you can use one you already have. I have a design that I put together using a laurel wreath, some fall leaves and adding in southern style text “happy fall y’all”. [I use Silhouette Studio].
As you can see, the Garden Flag design is going to be larger than a standard size 12” x 12” cut mat. That’s ok though since I am going to be using multiple colors to cut the design.
Since you’re using heat transfer vinyl you will need to flip your design horizontally.
You will cut each color individually and then puzzle piece the design back together when adding it onto the garden flag.
Note: I used foil and glitter heat transfer vinyl for this project because I love all things that glitter. You can use regular heat transfer vinyl and do as many colors as you want. I chose glitter because I already had scraps of all the colors I needed in order to complete the project. That is the great thing about garden flags, the designs you add to them can be made from scraps.
Editors input: Hot off the presses Craft Chameleon has foil and Siser adhesive!
Once all of your pieces are cut it is time to puzzle piece the design back together onto the garden flag.
Start with the center and work your way out. I used rose gold foil for my center but again, you can use whatever color you want. Place and press down your center, following whatever method you use for heat transfer materials. I personally use a heat press.
Now add your wreath or laurel and leaves. The key to applying multiple colors in one press is to make sure that the transfer layer on top of the vinyl is not under any other pieces of heat transfer vinyl. I trim my pieces really close to help with this. If that’s not doable for you then lay out how you want the design to be on the flag and press so that you don’t have any issues.
Looking at my picture above you may see some overlap but trust me none of it is under any other pieces of heat transfer. They can overlap on top but never have that top layer under.
Looking at my picture above you may see some overlap but trust me none of it is under any other pieces of heat transfer. They can overlap on top but never have that top layer under.
Now that your design is pressed onto your flag, it’s time to add it to your garden. Happy Fall Y’all!
Thank you, Liz and your cute little helpers!
For our readers, remember sharing is caring so we have 2 images we would really appreciate you sharing on your social media and on Pinterest.


No comments:
Post a Comment
Thank you for stopping by and spending time with us!
Be sure to share your thoughts or ideas on products you would like to see. Or share your creations made with Craft Chameleon products.