Hey guys Jennifer here as this weeks guest blogger! I'm excited to share this project because it's something I found very useful and also fun to make! My baby girl will be here any day now, and these closet dividers are perfect for organizing all the clothes from baby showers and thing I have picked up throughout my pregnancy. So let's get started!
Materials Needed:
* items have links to the Craft Chameleon items
*Oracal Vinyl
Transfer Tape
*Acrylic Closet Dividers with free designs
Alcohol Wipes (optional)
This is a fairly easy project and is perfect for someone wanting to learn how to use several colors of vinyl at a time. When you purchase the product, Craft Chameleon sends a few different digital files for boy themes and girl themes, but you can create your own using their files for sizing help.
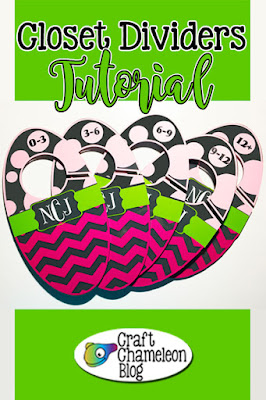
Since I am having a girl (and I am from south Alabama), I decided on the girl themed chevron and polka dots with space for a monogram. I removed the designs I didn't want to use and was left with pieces I needed.
REMEMBER- the files are perfectly sized for the acrylics so do not resize them if you are using the Silhouette Studio software. For those of you using Cricut Design Space a png is included in the files for sizing. Video here.
The only extra things I added to the design were a monogram and the numbers for the clothing sizes. Make sure you remember to size the monogram and clothing sizes for your design!
Once this is done, make 5 copies of each shape for your acrylic closet dividers. I wanted to cut all the colors at the same time, so I arranged them on the screen in a way that I could run the mat through as few times as possible. I did have to run the mat through a second time for the last polka dot pieces and the numbers for the clothing sizes.
Cut vinyl to size using a paper cutter (good old fashioned rules and scissors work too), then place the vinyl on the mat to match the screen. REMEMBER- don't mirror your sticky vinyl and the color goes on top.
Once all the pieces are cut out, weed each one and cut them out so they can individually be applied to the acrylic.
I forgot to snap a photo, but the acrylics have a clear protective film on each side that needs to be removed before you start. I also like to clean the acrylic with an alcohol wipe to take off any grime that may have gotten on there and to ensure my vinyl sticks as well as possible.
Using the transfer tape, take one piece at a time and layer it on the acrylic. This can be a bit tricky, but take your time. It is worth so worth it!
Once you have applied all your pieces to the acrylics, you're left with 5 precious closet hangers that are personalized!
Since these were made for personal use and babies grow up fast, I plan to remove the numbers as she gets older and replace them with new sizes. They would also be great to use in children & tween's closets separating trousers and jeans and blouses, tees and dresses.
A big thanks to Jennifer for this weeks tutorial! Remember sharing is caring, so we have provided 2 images to share on social media or Pinterest.
 |
| Share on your favorite social media. |
 |
| Pinterest sized image. |