Monday, December 14, 2015

Adjustable Bangle Bracelets

We've asked and Punch Place Plus delivered (because they're awesome)!

Punch Place Plus now carries Adjustable Bangle Bracelets!

They come in two great colors, gold tone and silver tone and they come individually packaged!! (LOVE that!)

The Adjustable Bangle Bracelets are amazing quality (best I have seen and wouldn't expect less from PPP's QC!) that will last you and your customers a very long time!

The bracelets are fairly simple leaving you with endless possibilities to jazz them up however you'd like.

I simply used oval split rings, acrylic blanks, tassels and added them onto the bangle. You could add them to both the top and bottom part of the bracelet if you'd like too!

1 5/16" Color Acrylic

2" Circle Acrylic


1" Acrylic Mirror Letters


15/16" Traditional Tortoise Acrylic


Stay tuned for a great tutorial on how to make your tassels "golden"!


Saturday, December 12, 2015

Punch Place Plus Holiday Schedule

Please, note the Punch Place Plus holiday schedule.

Happy Holidays from all of us at Punch Place Plus!


Friday, December 11, 2015

Ring It In...

With all of this jewelry you've been making, it's time to ring it in (not in a bad way)!


Punch Place Plus sells these amazing little ceramic ring dishes that would be perfect for holding all of your precious jewels!

I have seen these cute little dishes all over the internet. For purchase along with tons of DIY ideas on how to decorate them yourself from painting, adding animals, initials, dates, patterns and so much more!

For my ceramic ring dishes I decided to add a little something to help with holding all of my treasured jewels.

To make these ring dishes you'll need:
Ceramic Ring Dishes
Plastic Animal/Toy etc
Paint
Paint Brush
E6000


I first started off by washing my dishes and my plastic items to prepare them for paint. Once they were dried (you want to make sure the plastic piece you use is completely dry), I started painting. Making sure I got into the cracks and crevices of all the tiny parts of my plastic figurine.


You want to let them dry for a few minutes in between coats. If you don't it seems like you're just pushing the paint around and making a huge mess.

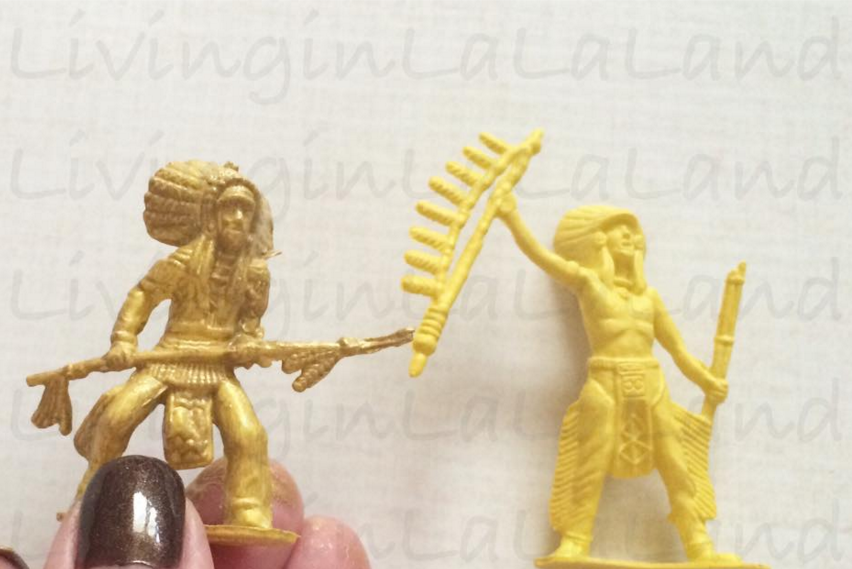
It doesn't look like I have painted him but I did.


Here is what it looked like before painting and after.

I decided to paint one gold and one silver.

Once the paint dries (the bottle of paint said 24 hours), I let them dry for 24 hours.


You can apply a little E6000 to the underside of the plastic toy (I don't know what happened to the picture?).
When I say a little, I seriously mean a little, you do NOT want it oozing out onto your ceramic ring dish;)
Place your plastic toy on the ceramic ring dish, and press it really good. Once it's where you want it, let the E6000 dry for 24 hours and you're all finished!


Don't they look awesome, expensive?!

Make sure and come back on Monday for something NEW to Punch Place Plus!!
Hint: It's in one of the pictures;)

Wednesday, December 9, 2015

Hotline Bling, Can Only Mean One Thing...

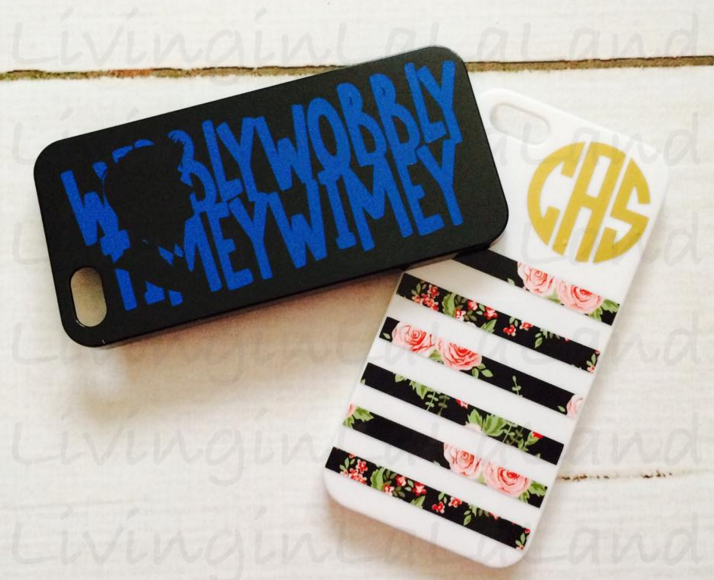
Hotline bling, can only mean one thing...Punch Place Plus has phone cases! (I know that was super cheesy but hey, my son won't let me do it in public or anywhere!)

Punch Place Plus carries 5, 5s, 6 and 6s phone case blanks that you can decorate in any way you like. (They do not currently have Samsung phone cases-so be sure and sign up for their newsletter and you'll be the first to know when they are! A little birdie told me it might be after the holiday's;)

The awesome thing(s) about the phone cases from Punch Place Plus (besides them being customizable), is that you get TWO at a steal of a price!

Today I won't to show you how you can customize some cases for either holiday gifts, your shop, craft shows or for yourself!

What you'll need:
iPhone Case Blanks
Vinyl
Transfer Tape

You're going to simply cut your design, weed it, apply the transfer tape and set aside.

Take one of the phone cases out of the package, clean it using soap and water.

Next, align the transfer tape and vinyl up to your phone case, apply it (but don't push it down onto the case just yet).


Slowly, gently use your finger and rub the vinyl onto the phone case. Why? Because they're not solid and if you push to hard, you're going to crack your case.

Once you feel that you've got the vinyl on there again, slowly and gently use your finger and get into all the cracks and crevices of the words/design. This ensures that when you pull the transfer tape off it won't take any of those pieces with you!


This is it, the moment we've been working so hard for, the releasing of the transfer tape.

You need to take this part slow and steady to or you'll pull off pieces of vinyl, give yourself bubbles and a headache.
Pull the corner of your transfer tape and roll/fold it back onto itself. This not only helps alleviate the bubbles but it also helps if you've accidentally pulled a piece of vinyl up with it. You'll simply push the transfer tape with the little vinyl piece back over rub with your finger and then remove again.


Now admire your awe-some new phone case!


I made this one for my son because he is getting an iPhone 5s for Christmas (and although he wants the newest version, he'll be happy with this and his new phone;)


I couldn't not make one for myself!


I am in LOVE with them and I know whoever gets one, they're going to love theirs too!

Monday, December 7, 2015

Take Note, Teacher Gifts Are Here!

This time of the year we are all scrambling to find and give that perfect gift to those who teach our little ones in school. So take note, teacher gifts are here!


Punch Place Plus offers a wide variety of products to use for any type of gift but they also offer gifts that are perfect for those who are in an office type setting or may need to take a lot of notes (shoot, I want one for my desk area!).

The items you'll need to make these are:
Acrylic Name Plates
Acrylic Post It Note Pad Holders
Vinyl
Scotch Tape
Exacto Knife
Post it Notes!

These are easy-peasy to do, you don't even need to use vinyl if you don't want to. You could use scrapbook paper and Mod Podge. Simply place your paper under the Post It Note Holder, and use your exacto knife to cut around it. Apply some Mod Podge onto the acrylic, apply your paper, then apply another coat of Mod Podge over the top wait for it to dry, add your top onto the Post It Note Holder and you're done!

For mine, I simply cut out a pattern that I thought fit each of my sons teachers personalities.
I took some scotch tape and applied it to where the top and the part that holds the post it pad meet (so I could align my design, there is no need to put it where the top will go because it won't be seen and you wouldn't have a very good seal/bond between the top and the pad holder if there were vinyl in between).

I flipped the post it over to line up where my scotch tape would go.
You can see the outline from behind.

 Applied the tape & cleaned my acrylic.

I then aligned my design up along the bottom of the tape and placed my vinyl design onto the post it note pad holder. I didn't cut my design to fit exact to the Post it Note Holder because I knew it would be harder to line everything up then to just line up the top.
Once it was aligned and on the post it note holder, I took an exacto knife and went around it cutting off the excess vinyl.

Now that the vinyl is adhered, we are going to attach the top part of the post it note holder. 

 I love that the post it note holders from Punch Place Plus come with an adhesive backing already on them! 

You're simply going to take the backing off of the adhesive.

 Better picture of the adhesive on the back.

 And align it with your post it note holder. 
(Please note that you don't have any room for error, so you need to do this part slowly!)
 I lined up one side at a time and then did the other side.)

Once it was on, I pushed on it in all four corners and in the middle; then turned it over and rubbed it to make sure it was on there good.


 Ta-da!
A very cute post it note pad holder!


For the Name Plates I didn't do anything special, in fact I only did names without a design. For one because they're males and two what if they move to another school?


 There you have it an easy, yet amazing looking gifts for teachers!!


I hope you'll share what you made with your Post It Note Pad Holders and Name Plates?!

As always, if you have any questions please don't hesitate to ask;)

Thursday, December 3, 2015

How to Create a Scalloped Monogram in Silhouette Software

This is probably one those tutorials where you're going to say, "Why didn't I think of that"?! Today I am going to show you how to create a scalloped monogram in Silhouette software.